This article was published in Scientific American’s former blog network and reflects the views of the author, not necessarily those of Scientific American
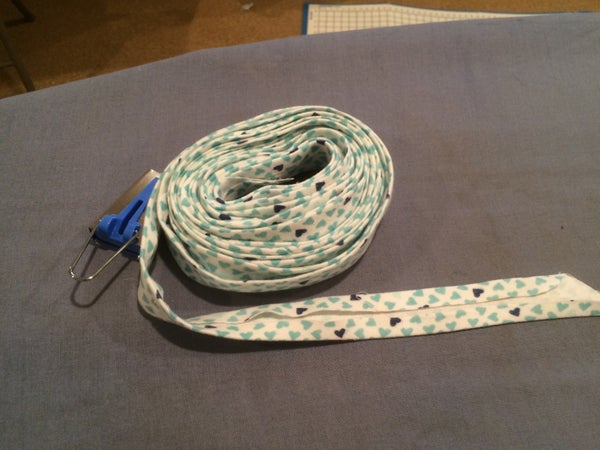
It all started with scratchy bias tape. Bias tape is made from strips of fabric cut along the diagonal of fabric (“on the bias”), making it stretchier and more forgiving than a strip of cloth cut parallel to the grain. Its flexibility makes it perfect for finishing curved edges. Unfortunately, the bias tape I bought for my most recent project, bibs for a new baby, was a scratchy polyester. Rather than try to find cotton tape that would match my colors well, I decided to make my own from leftover fabric.
One way to make bias tape is to cut several strips of fabric on the bias, sew them together, and then run them through your handy bias tape maker. This method is the most straightforward way to do it, but it has disadvantages. You have to make a bunch of seams one at a time, and you end up with some annoyingly small fabric scraps that aren’t really worth sewing together and get thrown away.

On supporting science journalism
If you're enjoying this article, consider supporting our award-winning journalism by subscribing. By purchasing a subscription you are helping to ensure the future of impactful stories about the discoveries and ideas shaping our world today.
A few years ago, a friend shared an amazing tutorial for making the tape in one continuous piece. I’ve used the tutorial a few times, and it never fails to amaze me. The link has the full details, but the main idea is that instead of cutting the diagonal strips and then sewing them together, you sew them together before cutting them out.
You start with a square of fabric, then you cut it along one of the diagonals and sew the top to the bottom.

At this point you could cut a bunch of bias strips that are all the same length and then sew them together one by one, but the tutorial is more clever still: you sew the left and right sides together. If you sewed them so they lined up perfectly, you would just end up with a bunch of rings of fabric. Instead, you offset it slightly so it naturally flows as one long piece of fabric when you’re done.

I’ve used the tutorial a few times now, and it never fails to delight me. It’s almost magical when you start cutting and end up with the bias strip you were after. The most recent time I made it, I concentrated on the topology of the process. When you sew the top to the bottom and the left to the right, you’re making a weird torus. Because of the offset on the sides, it’s not quite the same as the pretty rectangle picture of the torus, but it gave me an idea: could I make the weird torus first and then cut along the diagonal to cut the strips out? I had to try!
First I cut a square out of fabric and drew the diagonal lines on it to help me line up my work.

Then I sewed the first seam, making the square into a tube.
.jpg?w=1350)
Then came the hard part, sewing the left side to the right side on an offset.

I did it! I ended up with a torus with a hole in it because of the offset.

At that point, in theory, I could just start cutting and eventually work my way around the whole torus.
.jpg?w=1350)
It worked!

I was thrilled that it worked, but mathematicians are hard to satisfy. As soon as we solve a problem, we want to see whether we can simplify the proof or generalize the theorem. My bias tape adventure was no different. The weird torus method was fun, but could I do something to avoid having to sew the edges along an offset? Could I use an honest-to-goodness torus instead of a weird one?
To figure out how to attack the problem, I had to think about why I couldn’t just sew a regular torus in the first place. The reason is that if I did, I would end up with several loops of bias tape instead of one long piece. On a deeper level, the problem was that bias tape is cut at a 45° angle to the grain of the fabric. Thinking of the fabric as a piece of graph paper, bias tape has a slope of 1. I can draw it on graph paper by dividing the top/bottom and left/right sides into the same number of pieces and connecting the dots. I'll get as many loops as divisions of the top and bottom.

If I divide the top/bottom and sides of the torus into four pieces each, I get four separate strips.
In general on a torus, if I divide the top/bottom into m pieces and the left/right sides into n pieces, I'll get gcd(m,n) separate strips. If m and n share no factors, I'll get just one strip, as desired.

If I divide the top/bottom into four pieces and the sides into three pieces, I get just one strip. Don't believe me? Follow the strip around with your eyes or finger.
The only problem is that I'm not making bias tape anymore. I'm making off-bias tape. The slope of my tape will no longer be 1 but some fraction close to 1. If I divide the bottom into m pieces and the sides into n pieces, the slope will be m/n.
How much does the real world care that my bias tape is not perfectly biased? Sewing is an approximate endeavor, so I decided the real world wouldn't care very much if my bias strips weren't quite perfect. Emboldened, I decided to go for it.
I crunched the numbers and determined that in order to get 2-inch wide bias strips, I needed to start with a 24-inch square of fabric and split it into ninths on the top and bottom and eighths on the sides. Then I connected the dots.

With the right sides of the fabric together, I sewed the top to the bottom and the left to the right. I had a torus with a long spiral around it.

Then I snipped a little hole in it and started cutting.

It worked, and I ended up with a 288-inch loop of almost-bias fabric that I cut to make one long strip. I especially enjoyed noticing this little spot where the corners of the original square came together and showed me a little right triangle with leg lengths in the ratio 8:9. In typical bias tape, this spot would be an isosceles right triangle.

Surprisingly to me, when I used the off-bias tape, I did notice that it felt a little less flexible than true bias tape. I'm sure if I added more divisions to each side, changing the slope from 9/8 to 11/10 or 24/23, for example, the off-bias tape would act more and more like true bias tape. But my 9/8-bias tape got the job done. (Quite adorably, if I do say so myself.)

My toroidal method is not the best way to make bias tape. That honor goes to the tutorial I based my experiments on in the first place. If you just want to make some bias tape in a clever, efficient manner, you should use that one. But my experiments helped me understand both bias tape and the geometry and dynamics of the torus on a deeper level.
This project also got me contemplating the hidden mathematics in sewing. There is a lot of obvious mathematics in sewing: measuring fabric, grading patterns, calculating seam allowances. But the mathematics in sewing is much deeper than those skills. When you get down to it, sewing is applied geometry. You are using flat pieces of fabric to approximate the curvature of a complicated surface. Seamstresses and other sewists don’t get much credit for their research in applied geometry, perhaps because traditionally "feminine” activities are not assumed to be very mathematical. Of course, those of us who sew or make crocheted hyperbolicplanes or Klein quartic curves know better!